Speeding up Chrome – January 8, 2022
There are some simple steps you can take to make sure that your Google Chrome browser is operating at optimum speed so you can run jobs in Relativity and other web based applications at the best possible speed. Chrome is notorious for taking up a lot of memory. See the Tip of the NIght for April 6, 2021.
First access Chrome’s Task Manager by clicking on the three dot menu, and going to More tools . . . Task Manager:
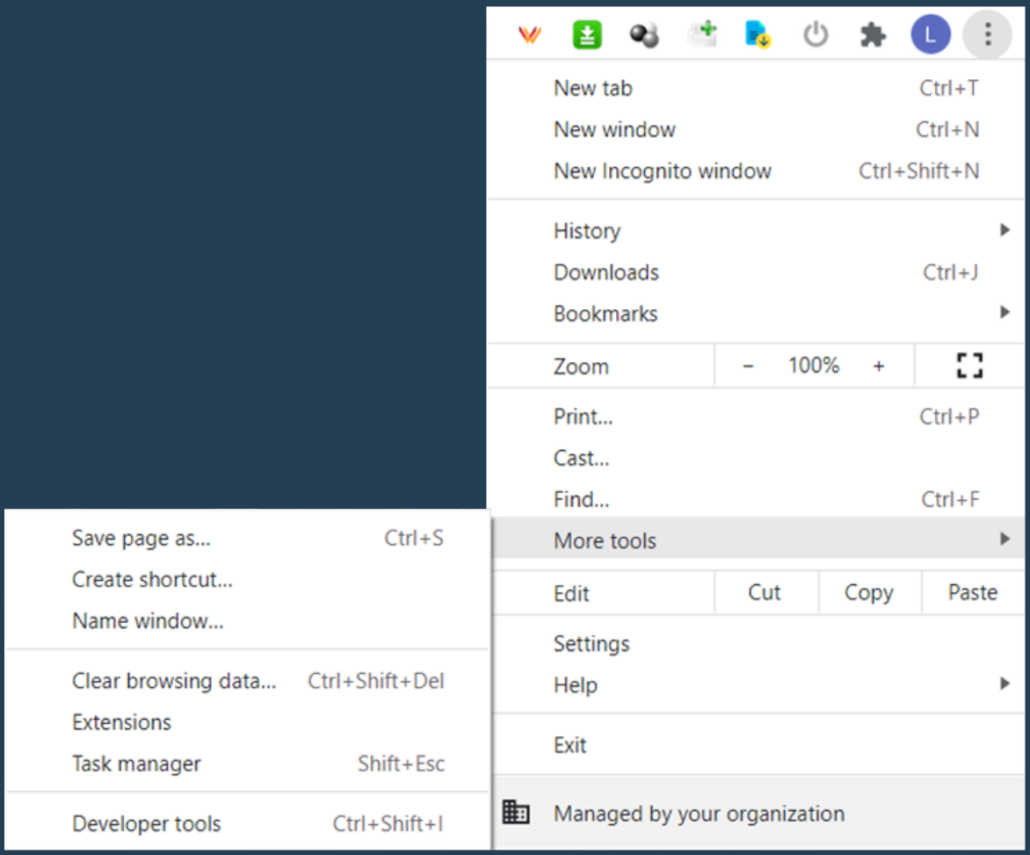
In Task Manager, sort in the ‘Memory footprint’ and find which tasks are taking up the most memory.

You may find that some extensions added to the browser, and some processes listed as subframes are taking up a significant amount of memory. You can end these by clicking on the blue ‘End process’ button at the bottom of the window.
You should be careful about shutting down subframes. They are used to prevent some sites from improperly reading data input into another site.
You should see task named GPU Process taking up a lot of memory. This is used to render graphics on a web page, and should make online browsing faster.
Google recommends shutting down tasks which are designated as Background pages. These are html pages utilized by extensions.

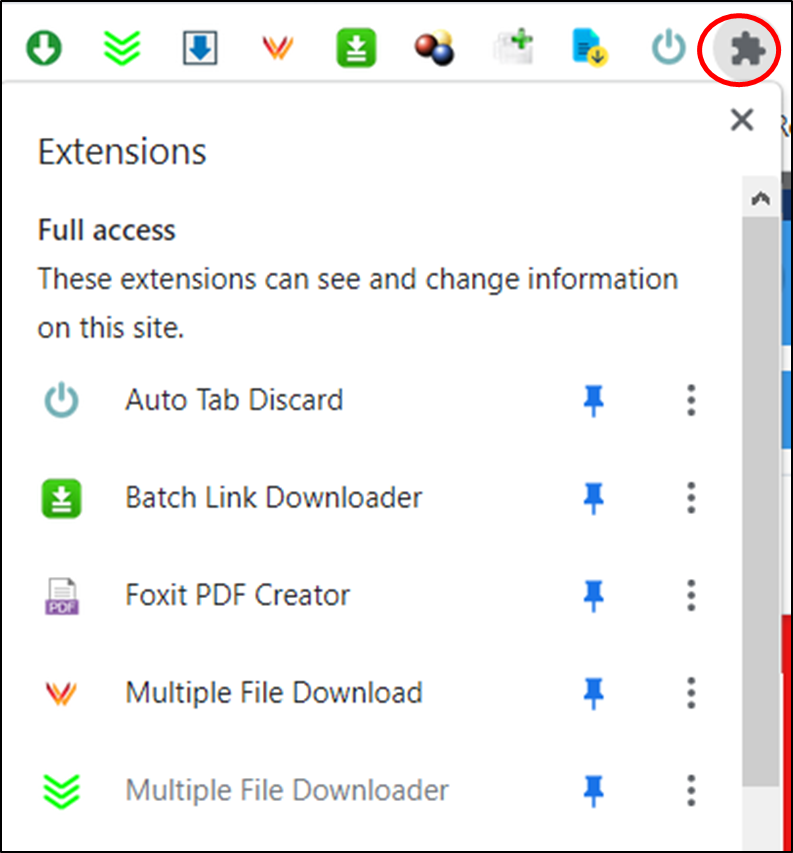
The amount of memory that Chrome uses can increase greatly if you have a lot of tabs open. There is an extension called Auto Tab Discard which can be used to essentially hibernate other open tabs. The tabs will still appear to be open in your browser, but they will not take up as much memory. Auto Tab Discard appears as a small power button icon on the top toolbar in Chrome. (Be sure to click the puzzle piece icon on the far right of the browser so you can manage which extensions are displayed, after installing Auto Tab Discard.)
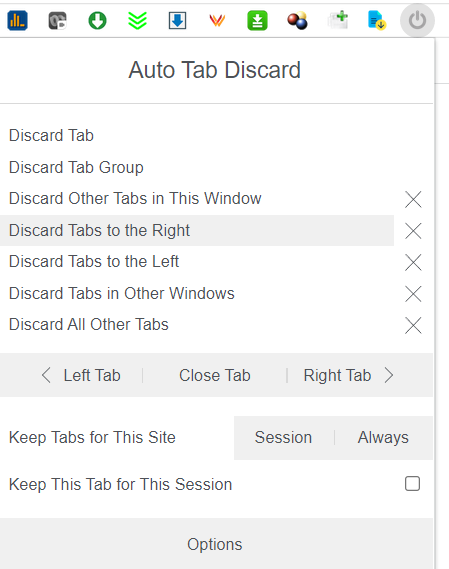
Auto Tab Discard will give you the option to ‘discard’ tabs to the left, to the right, or all other tabs other than your current one.
When these options are toggled on, the tabs will not close, but a small snoring ‘zZZZ’ icon will be added to them indicating that they are in a suspended mode.

Auto Tab Discard will retain data input on a page, and your position on a page. I tested it tonight and confirmed that it will not log you out of Relativity.
As soon as you click back on a discarded tab, it will automatically reactivate.
Using Cluster Visualization to Prioritize Review – January 15, 2022
The Tip of the Night for August 6, 2019 and August 7, 2019, discussed how to use cluster visualization to double check coding for responsiveness in Relativity. Note that Relativity recommends also using cluster visualization to perform other common document review tasks, including prioritizing the review of the documents most likely to relevant, when you have little time to review a large document set. Follow these steps to accomplish this:
Keyword filters can be applied after visualization has already been run on a cluster. See the Boolean search added in the Keyword Search box in the red box in the below screen grab. This generates a heat map, in which the documents that should be prioritized will be in the darkened circles.
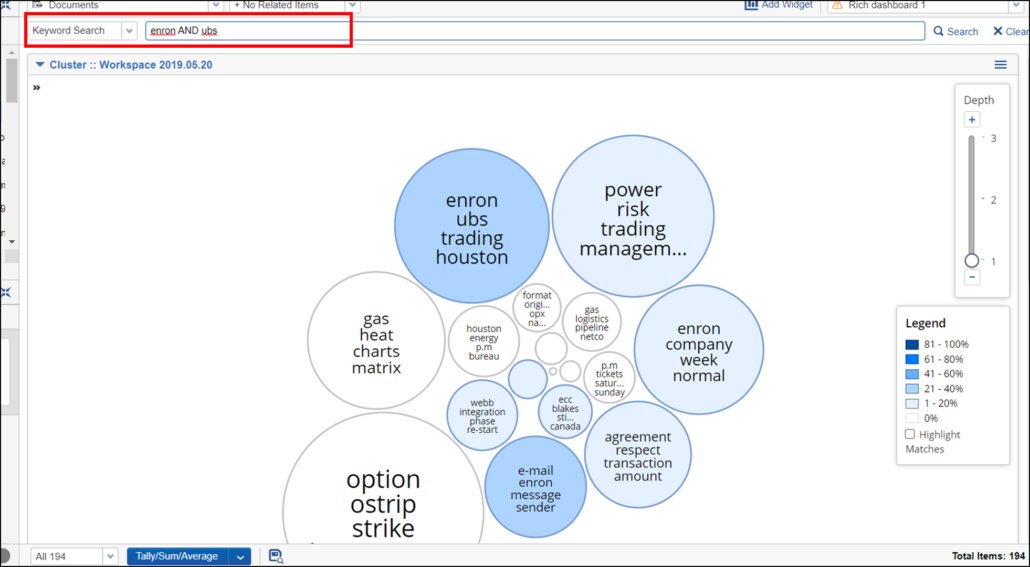
These dark clusters can be mass edited so they are added to a field used to batch them for prioritized review.
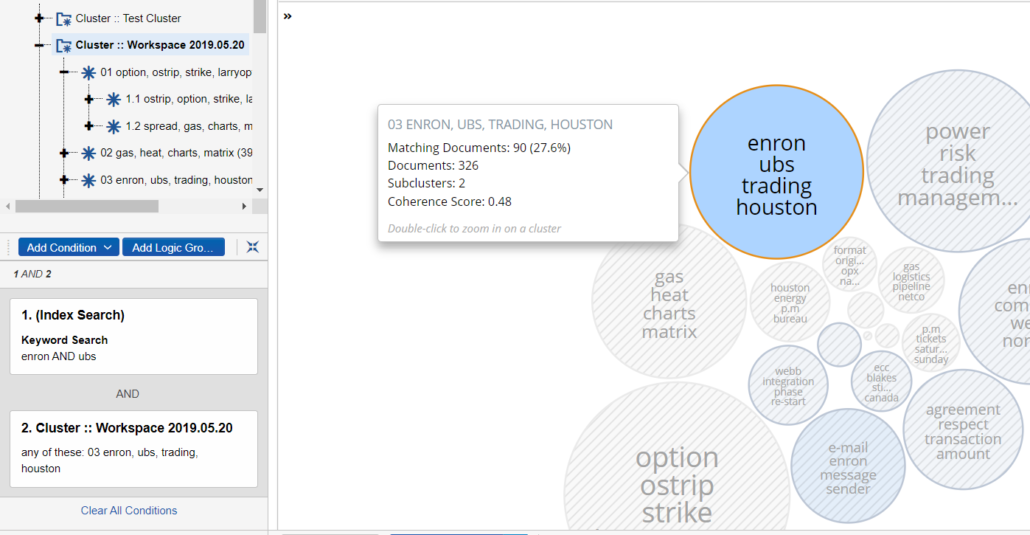
When the keyword filters are run on the visualization, and when a specific circle is clicked, the search panel at the lower left will update.
Collapse the cluster visualization by clicking on the arrow at the top left, so the document list is shown.
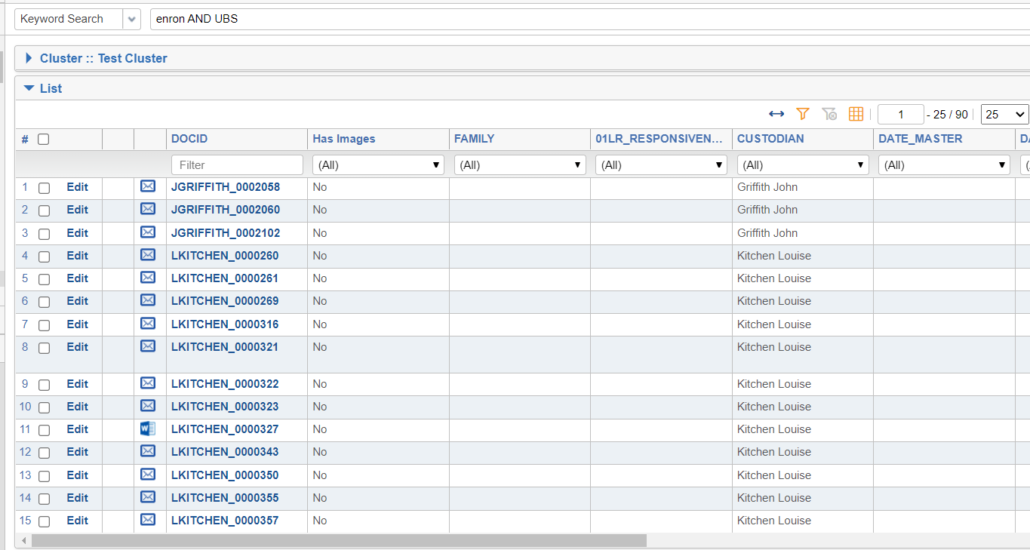
The Edit mass operation can be used to designate the documents in a field, which can in turn be used to batch the documents.

The Edit mass operation will prompt you to select a layout.
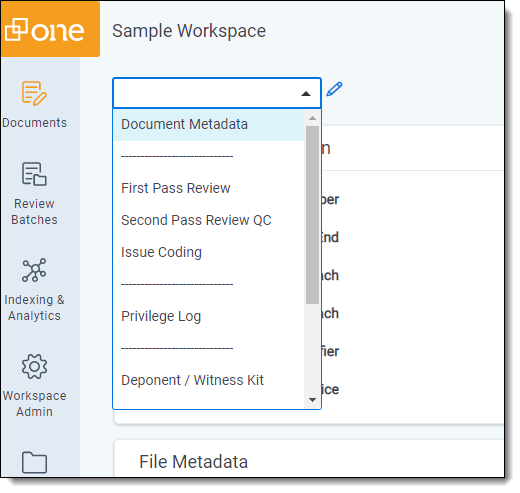
Click on the pencil icon to begin to edit the layout. Check the appropriate field, keeping in mind that if the box is just shaded, the value in this field will be left as is.
The documents in the list generated from the cluster visualization can be added to saved search so they can be used as a batch data source.
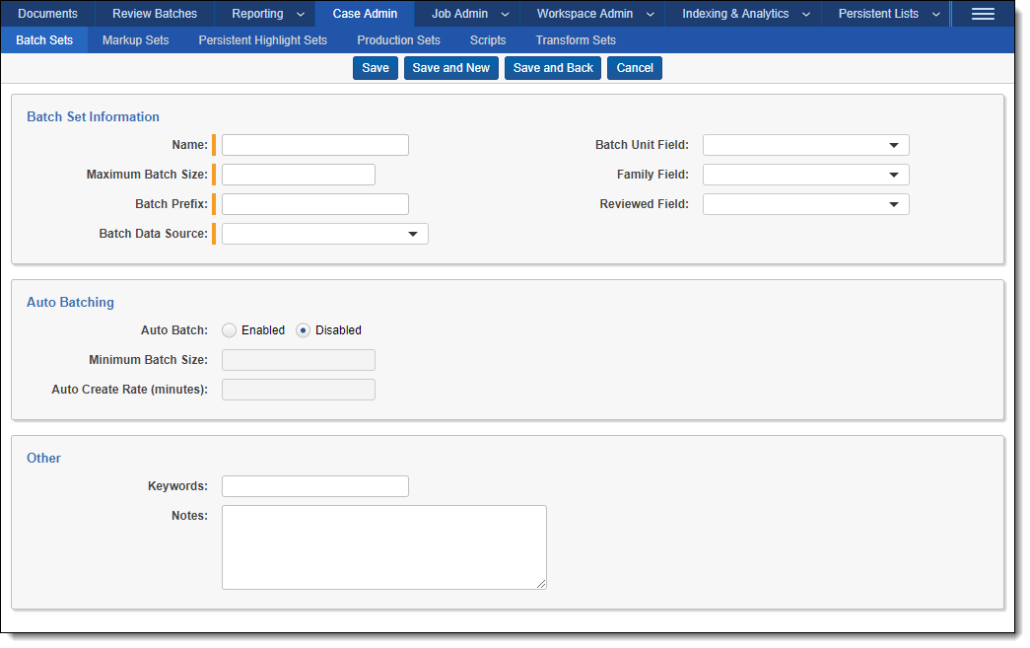
Enable the ‘Auto Batch’ setting to create the batches as quickly as possible for the prioritized review.
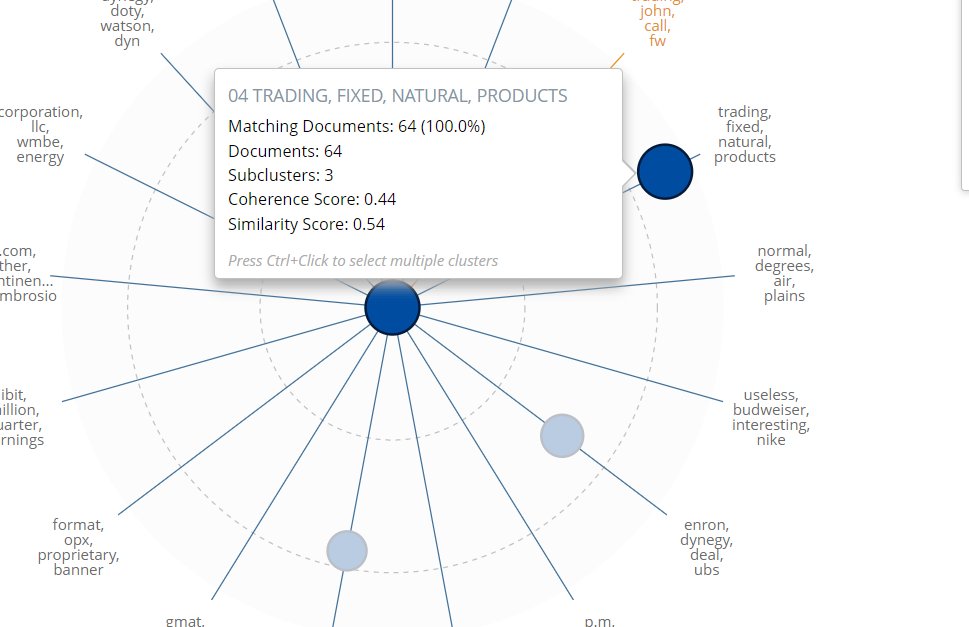
You can right click on the darker cluster in the heat map and select the option for ‘View Nearby Clusters’, to find additional documents which should be added to the same batch set.
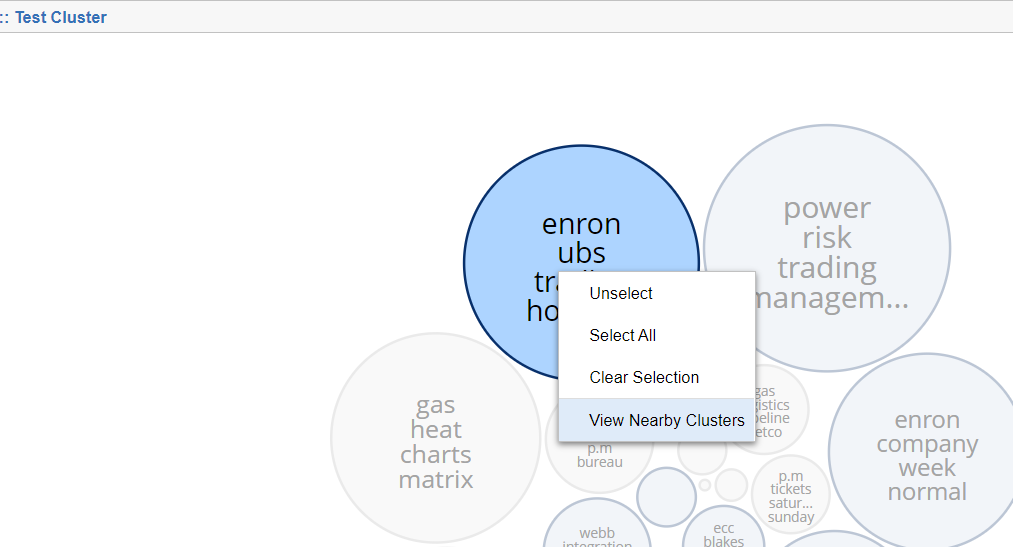
This option will show which conceptually similar documents should be batched as well.
Formatting Text Files to Load Correctly – January 22, 2022
If you have to re-format a text file to load it correctly into Lexis TextMap, it will be important to get several things exactly right. If not, it’s possible that you’ll get an error message like this one:
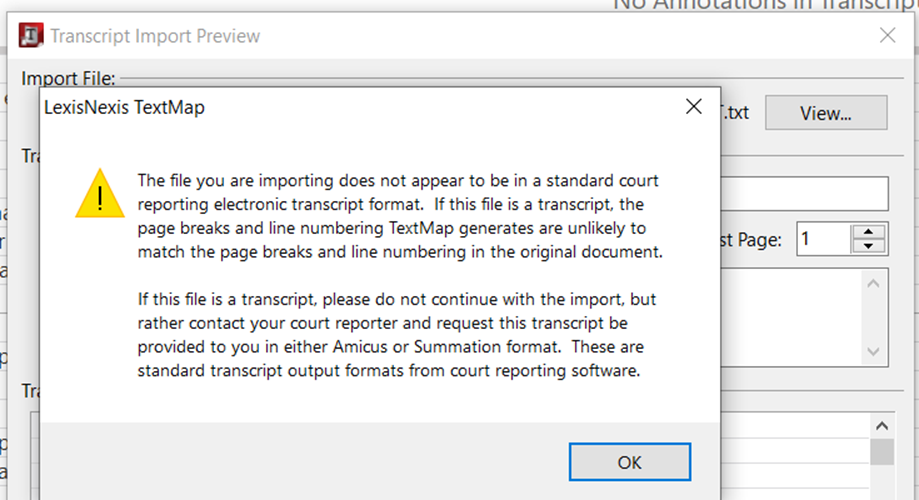
The transcript may still be loaded if this message appears, but you’ll have the line numbers added into the text itself, so they’ll be selected when the text is. Searching through the transcript may also be adversely affected.
In order to conform a text file to the Amicus format used by TextMap, be sure to follow each of these steps:
1. Make sure that each page break is identified by a four digit number listed by itself on one line.
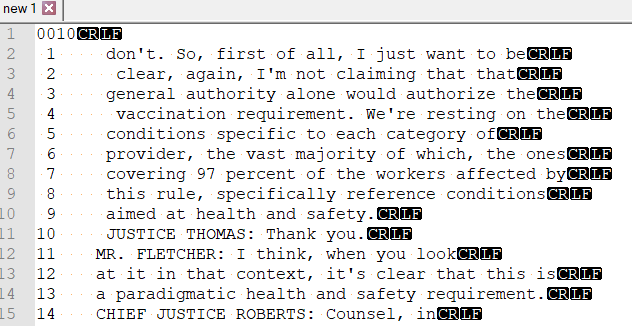
2. Each line number should be listed at least three spaces before the transcript text. There should be one space before the single digit line numbers.
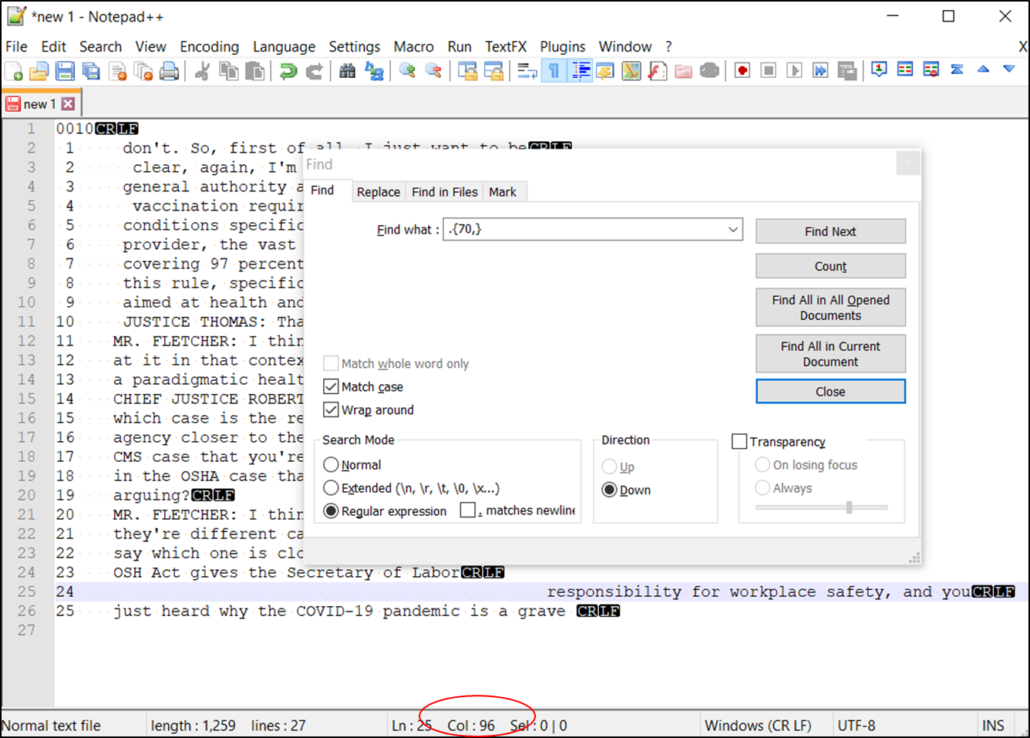
3. No line should be more than 70 characters long. (I’ve seen documentation stating that each line should be no longer than 78 characters, but the actual limit appears to be smaller.) Note that you can run a regular expression search for lines longer than 70 characters using this form:
.{70,}
. . . which is for any character repeated 70 or more times. In the free text editor, NotePad++, the position on a line will be listed at the bottom as the ‘column’ in which the character appears.
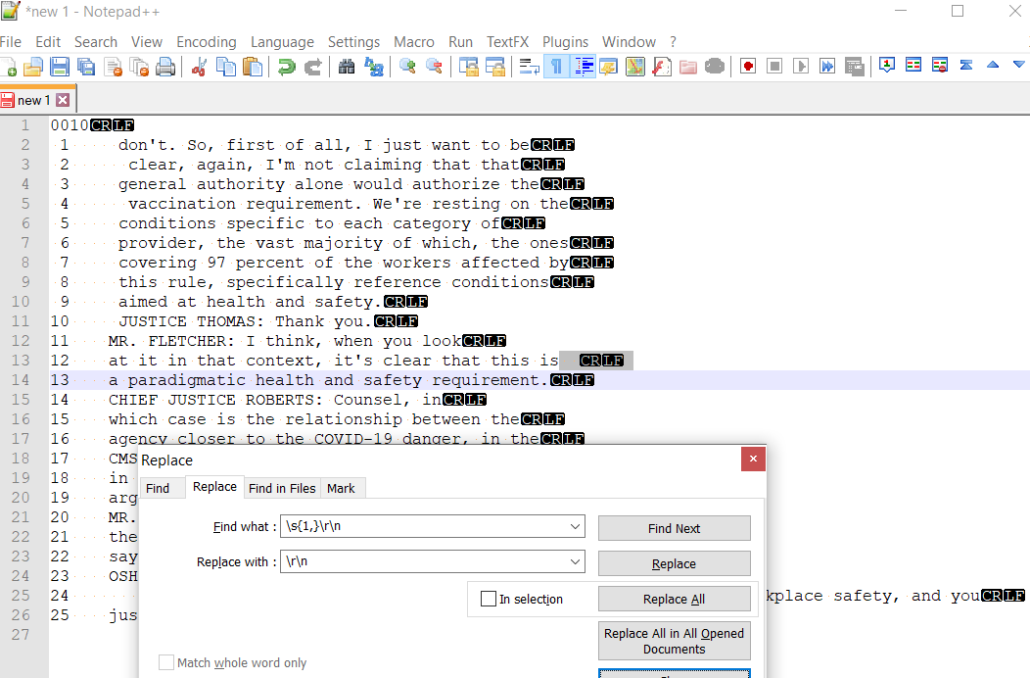
4. Also confirm that there are no blank whitespaces at the end of each line, and that the last text on the line is followed by a carriage return and new line marker.
5. If you have any pages which are longer than 25 lines, have the line numbering run from 1 to 25 on rows 1 to 25, and then leave the last lines unnumbered.
6. Confirm that the transcript doesn’t have any blank lines. Make sure that it doesn’t end with a blank line!
7. If all else fails, try copying the text into an entirely new file in NotePad, and saving it in the format of a ‘Normal text file’.
See also the Tip of the Night for January 29, 2022, which discusses how to remove non-ASCII text.
Searching for Non-ASCII Text in Text Files – January 28, 2022
Here’s a supplement to the Tip of the Night for January 22, 2022 which discussed how to format a text file correctly so that it will load without errors in Lexis TextMap. When preparing a text file to load in a deposition transcript review application, be sure to remove any text which is not ASCII text, the general encoding standard widely used for transcripts.
Commonly used characters such as:
- A dash – [which can be replaced with a hyphen – ]
- Curley quotes “ [which can be replaced with straight quotes “]
- Smart apostrophes ‘ [which can be replaced with a straight apostrophe ‘ ]
. . . are not ASCII text. When a platform like TextMap loads a file with these characters, they will not be converted correctly and result in garbled text such as;
Let’s
. . . instead of:
Let’s
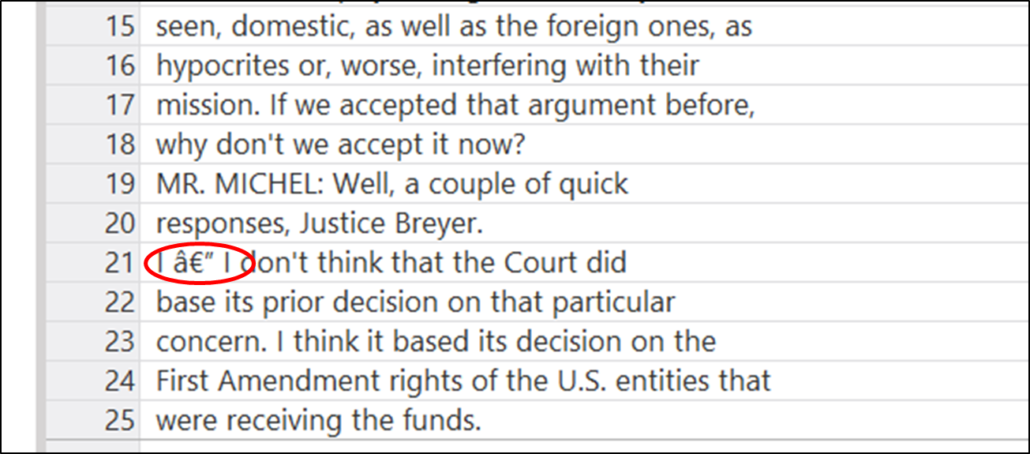
So if you see an em dash in a text editor like this:
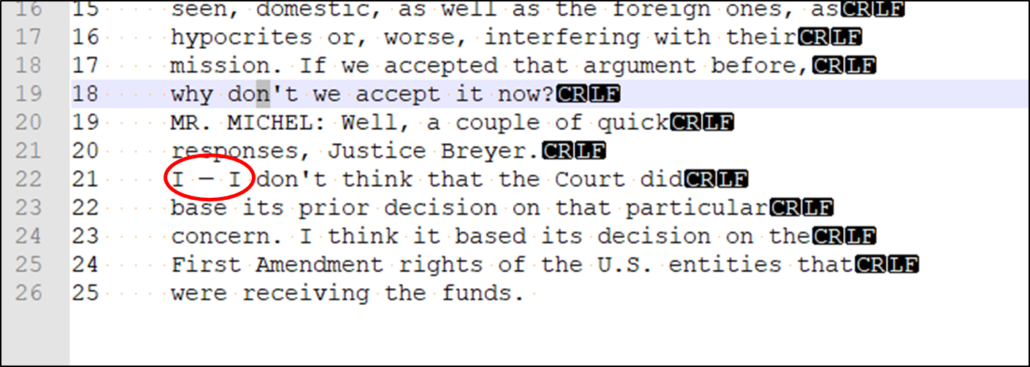
. . . in TextMap it will display like this:
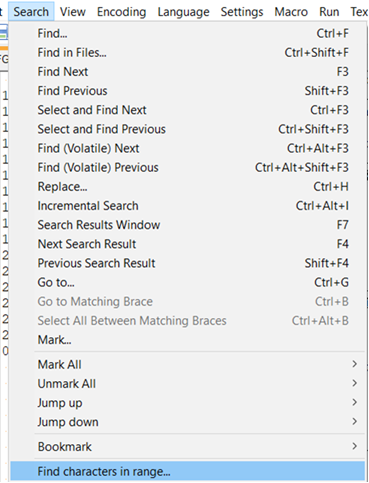
You can find non-ASCII characters in NotePad ++ by going to Search . . . Find characters in range
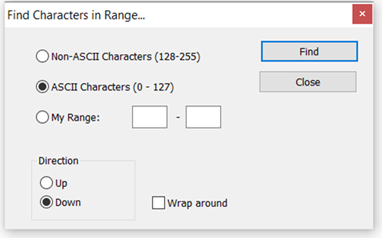
A dialog box will open that will give you the option to search for non-ASCII characters.
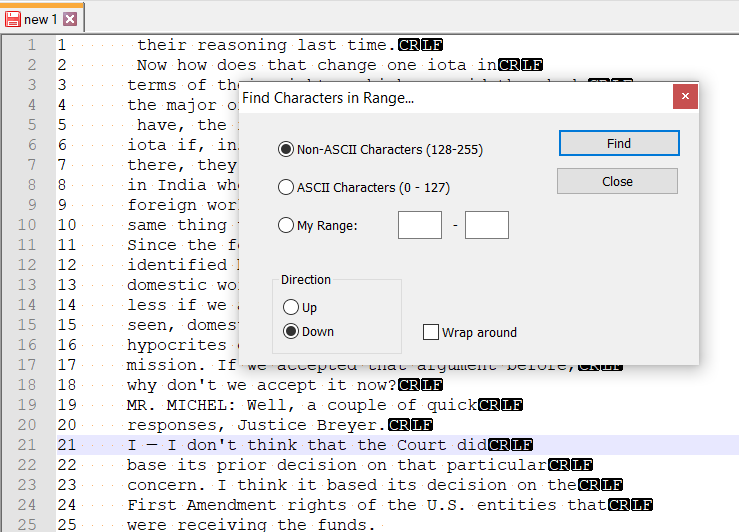
. . . this will allow you to jump to each non-ASCII character in the text file one by one.
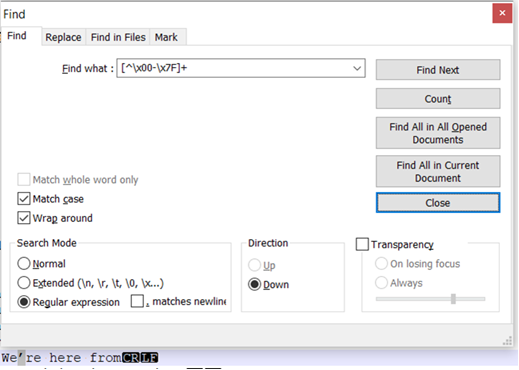
If you’re not using NotePad++ you can run this regular expression search to find any non-ASCII characters.
[^\x00-\x7F]+
