August 8, 2023: Detect Whether or Not Text Was Generated by AI
It’s becoming more and more common to come across text on the internet which appears as though it may have been written by AI. You may question the usefulness of the information, which may simply serve as clickbait, or want to avoid using it as a source in a legal filing. There are several services which can help determine if text was created by an artificial intelligence program. GPTZero, will let you test a limited amount of text for free. It appears to be reliable.
Back on February 11, 2023, I posted about using ChatGPT to help solve litigation support problems. See this post.
I tested the answer that ChatGPT gave when I asked it to explain the EDRM.
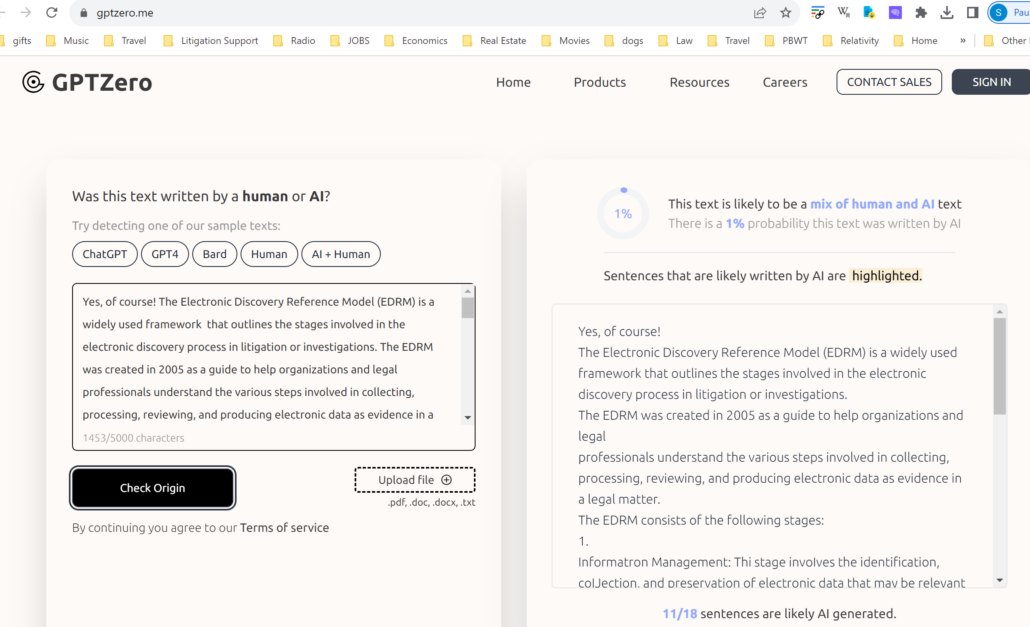
GPTZero found that 11 of 18 sentences used in the answer were generated by AI, although oddly it said that there was an only 1% probability of the answer being AI text.
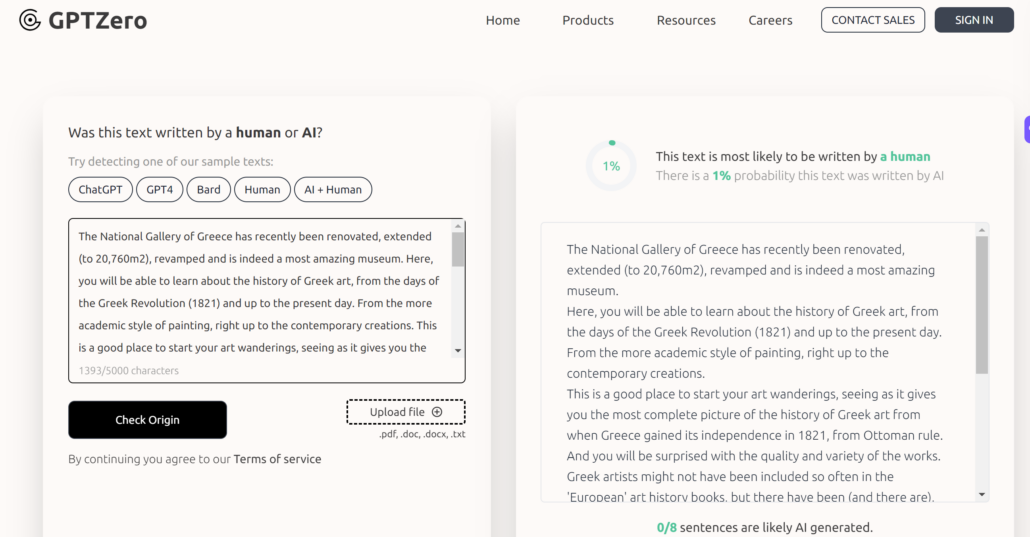
When I tested some text on a travel guide site that I thought was suspicious, it gave the same probability result, but more to the point did not think that any of the sentences were AI text.
August 13, 2023: Dealing With WiFi That Blocks VPNS
Sometimes when using a wifi network with a VPN connection for security you may find that the network will not allow you to log on.
Governments like those in power in Turkey and Russia can set networks to block VPNs, and it’s common for companies like Netflix to restrict their use to exclude unauthorized users. VPNs typically transmit data with information that allows a provider to flag them – but this data can be obscured by a good VPN service. Even public companies providing wifi access will restrict VPNs. When using a wifi network for legitimate purposes, it’s always justifiable to keep your data secure with a VPN.
If you’re stuck somewhere using wifi that blocks VPNs, there are some solutions to consider. You may wish to clear the cookies your browser has stored first to ensure you have the latest version of a wifi login site.
Browsers use port 443 for secure https sites with encrypted traffic and a VPN can be configured to run on this port.
You can also try using a service called smart DNS proxy, in place of a VPN, which works by removing location info from the connection and masks how the IP address assigned by DNS – the domain name system – is shown to a website. It does not offer all of the privacy protection of a VPN. Some VPNs will include a smart DNS proxy option.
If all else fails , try using the TOR network. TOR will send the VPN through multiple routers set up on its network to mask the VPN but it will also slow down your connection considerably. Some VPNs come with an option to use the TOR Onion browser.
August 19, 2023: Why 255 Is a Hard Limit in Windows
You may have noticed that 255 often comes up as a hard limit in computing again and again.
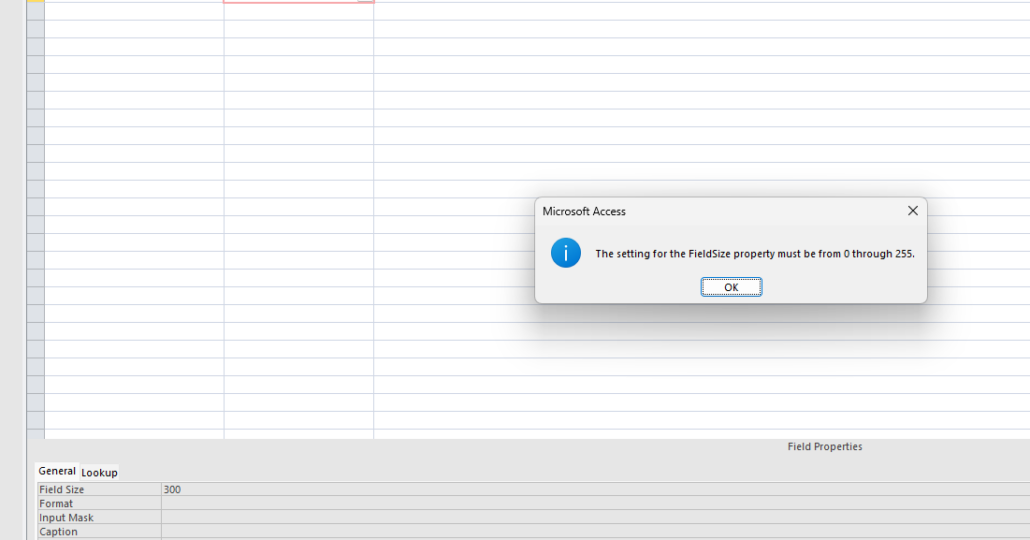
A short text field in a MS Access database cannot be more than 255 characters.
It is not possible to search for more than 255 characters in the MS Word find tool.
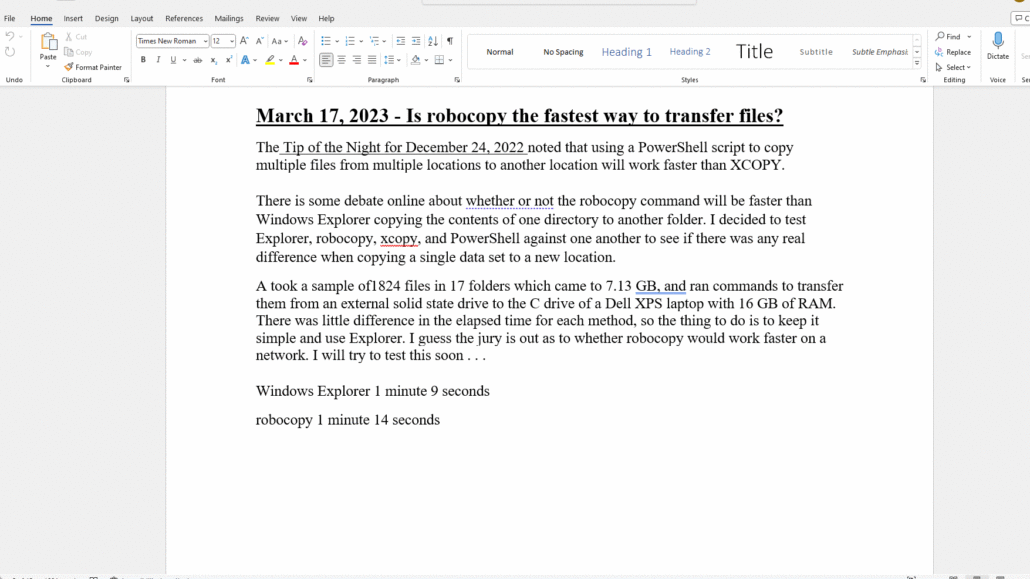
And of course as discussed in the Tip of the Night for December 22, 2019, the number of characters in a single file path that can be accessed by Windows Explorer cannot exceed 255.
Why is 255 the numerical limit? It has to do with 8-bit computing. Compuer systems use binary code – a series of 0s and 1s to represent values. So for example, a lower case ‘x’ in binary code will be represented as 01111000. A combination of zeros and ones is used to represent letters and numbers. The earliest computers had 8 bits to a byte – so the most basic data blocks could have no more than 255 characters – two to the eight power, 2^8 equals 256. Modern computers can use 64-bit data blocks, which can represent a far greater number of values (2^64 equals 18446744073709552000). However, software devs often design programs so that they don’t take up more storage space than necessary – and the smallest possible storage spaces are 8-bit blocks. The limit of 255 is imposed, so larger 32-bit or 64-bit data blocks are not taken up.
August 25, 2023: Creating a Table of Contents in Word
Creating a Table of Contents in Word should not be a great technical hurdle, but I find that the process in MS Word 2019 is not entirely intuitive, so I thought I would pass along my notes on how to go about it. After the cite check of the legal brief is completed, there’s often a rush to complete the ToC as soon as possible so the brief can be filed. It will be necessary to place the title page and ToC on pages with different pagination than the rest of the brief, and create the headings for the table itself.
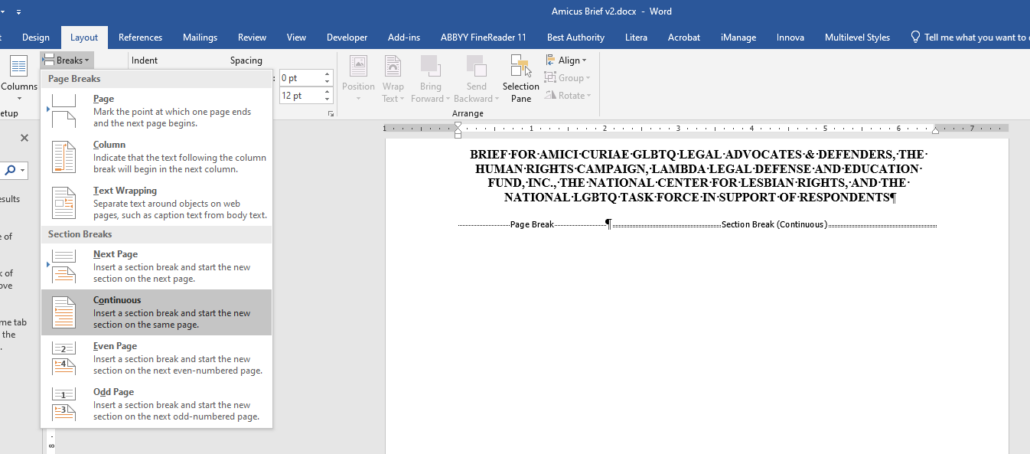
- First enter a Page Break on a new line after the title. Go to Layout . . . Breaks. Then after the page break marker, enter a continuous section break:
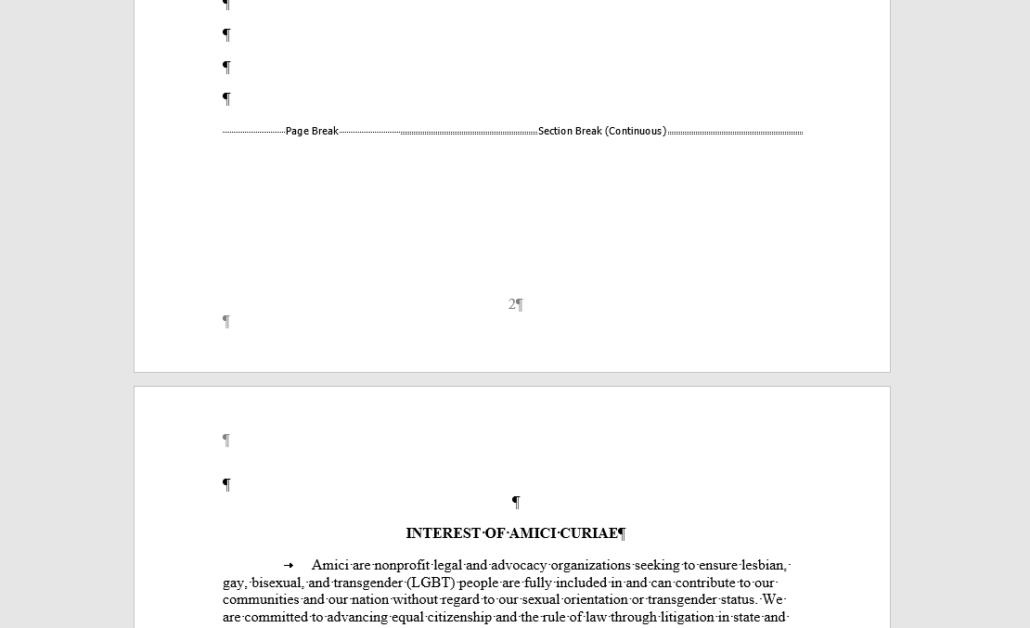
2. Then set a page break and a continuous section break at the end of the TOC/TOA section. (I assume that you’re working with an add-in for Word, like Best Authority, that will generate a Table of Authorities.).
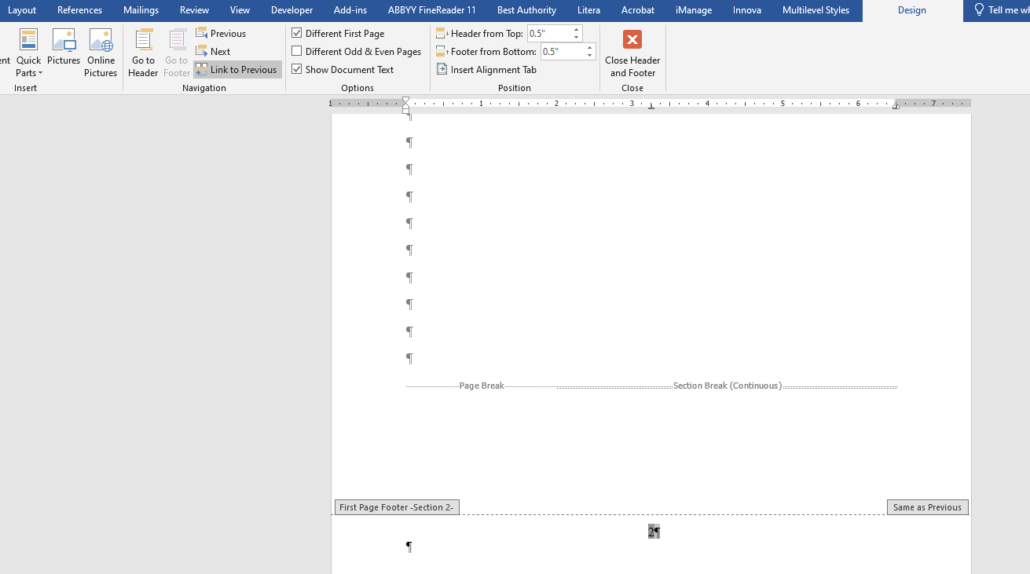
3. Unlink pages numbers in the TOC/TOA section from the title page by unselecting the ‘Link to Previous’ setting on the Design tab. [Click in the Footer to get the Design tab, and select the page number.]
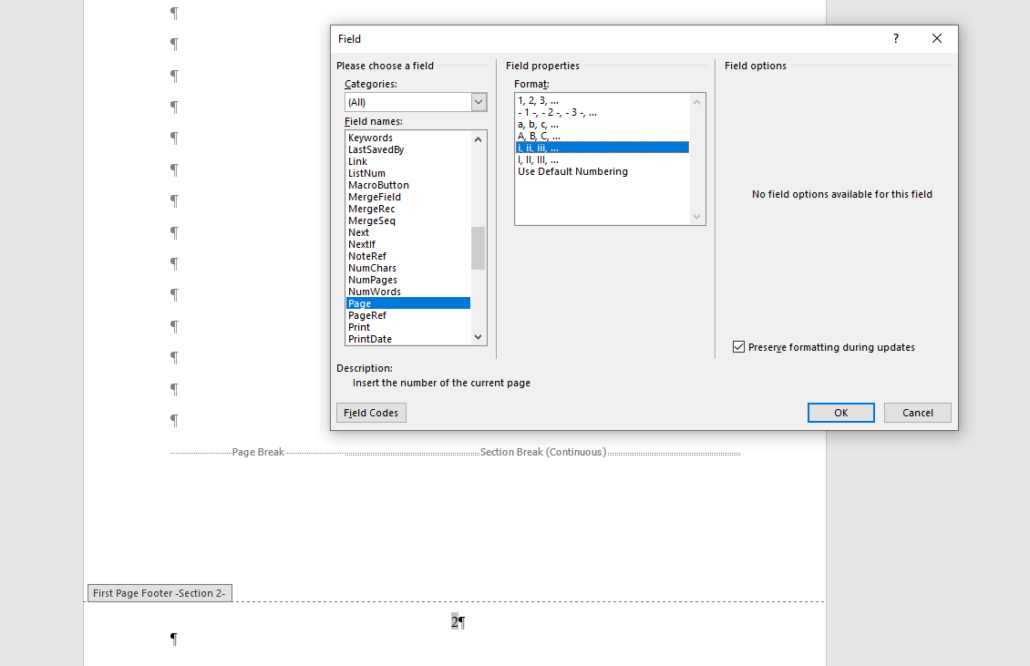
Also in this step, change the format of the page number in this section to lower case Roman numerals, by selecting the page number in the footer and right clicking and selecting Edit Field.
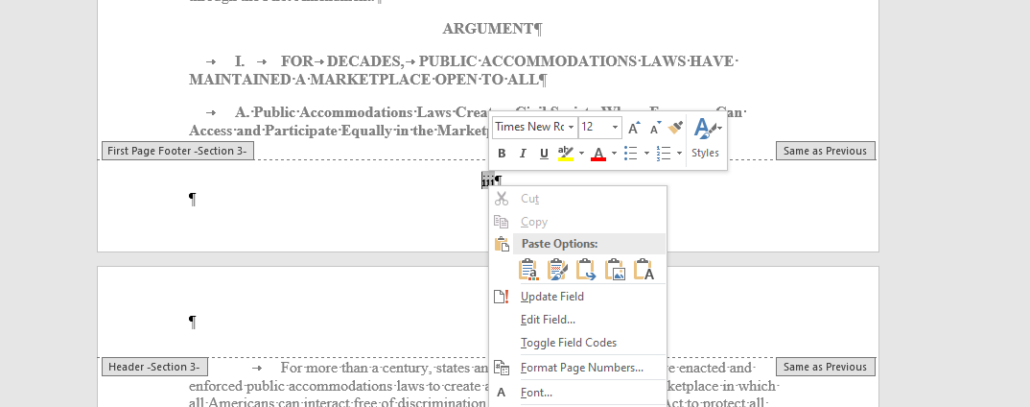
Delete the page number for the title page.
4. Unlink pages numbers in the BODY section from the TOC/TOA section by unselecting the ‘Link to Previous’ setting on the Design tab, and selecting the Arabic numeral format. The brief should now have three independently page numbered sections.
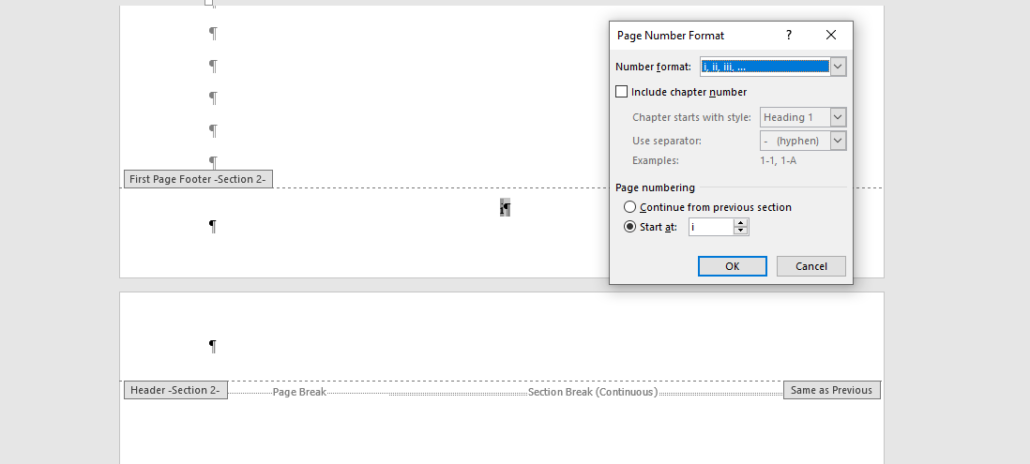
Right click on the page number and select ‘Format Page Numbers . . . ‘ to confirm that each section begins at 1.
At this point run the ToA.
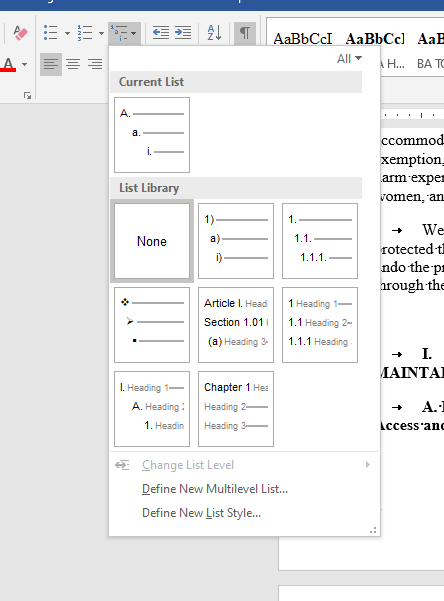
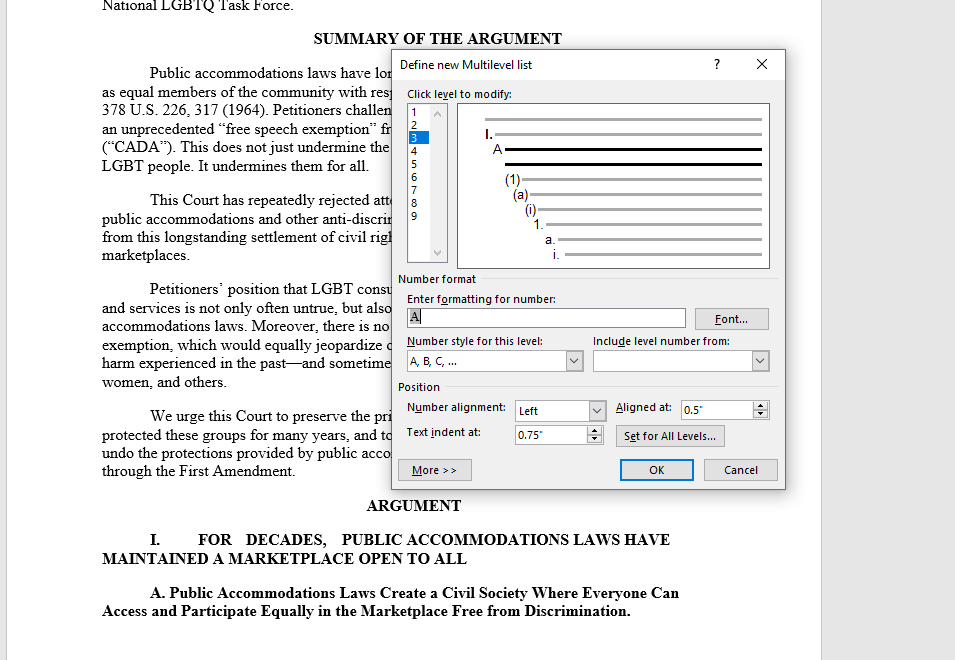
5. On the Home tab define the formatting for the ToC. Go to the option for Multilevel list in the Paragraph section, and then select ‘Define New Multilevel List . . .’
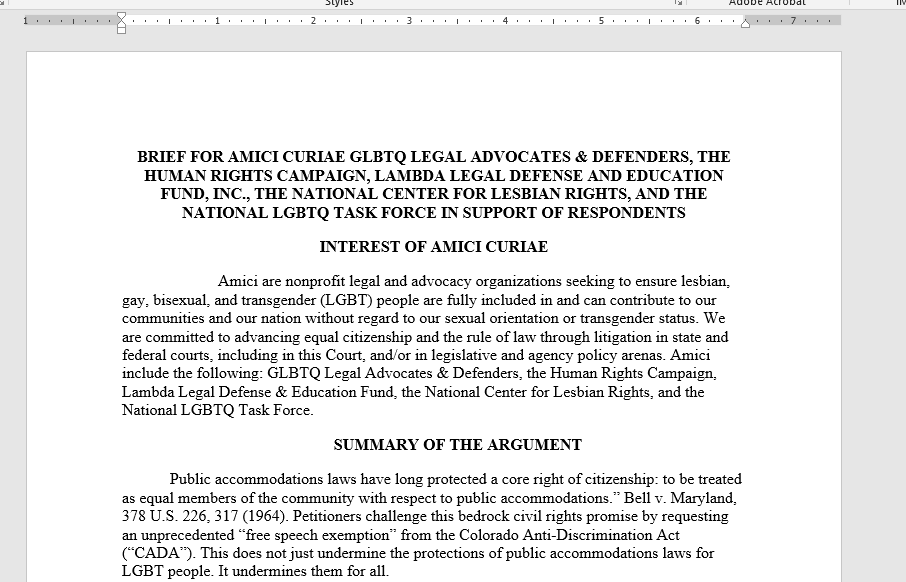
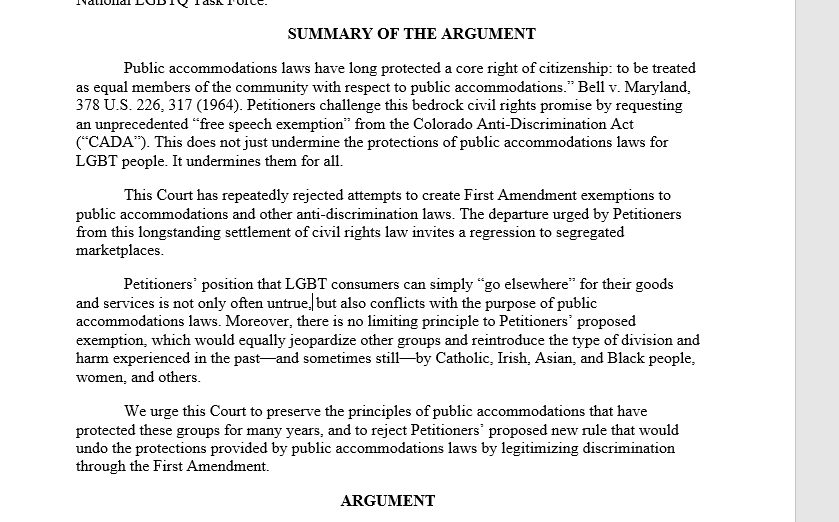
So for level 1 because we have headings like this in brief:
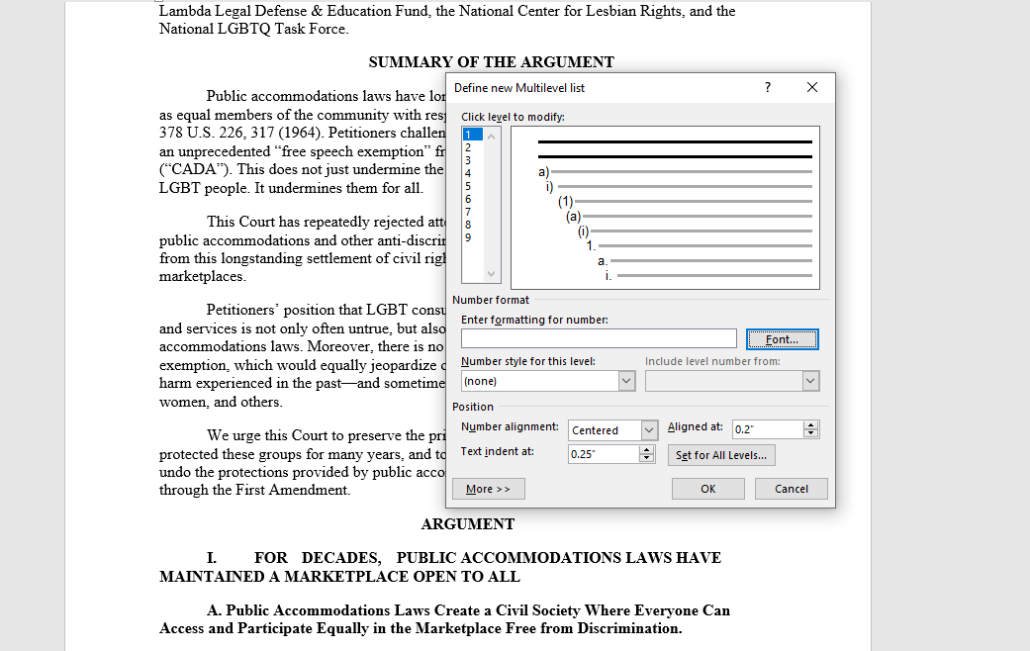
. . . we leave the ‘Enter formatting for number’ box blank; set the number alignment to ‘Centered’, and also set the Font to boldfaced.
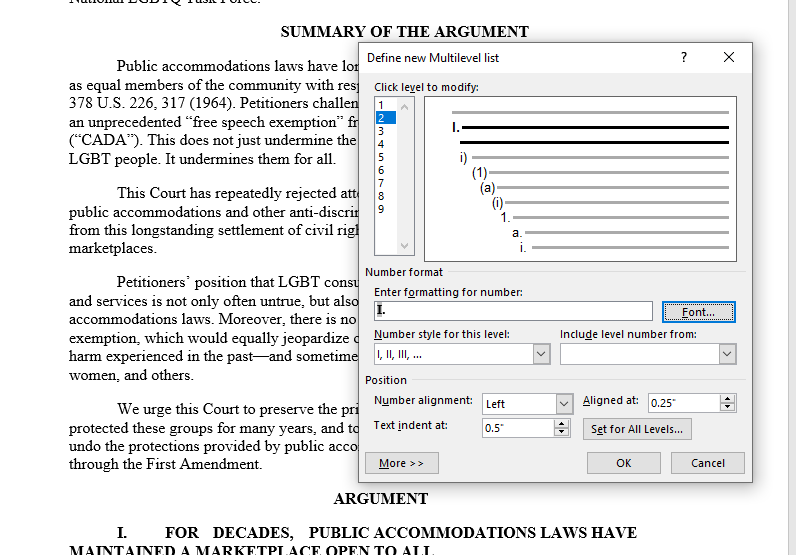
Then for level 2, we select uppercase Roman numerals; set the alignment on the left, and again boldface the text.
Then on level 3, we select uppercase letters; set the alignment on the left with a further indent; and boldface the text.
6. Select the headings in the Word document and then on the References Tab in the Table of Contents section select Add Text and set the level for each heading one by one.
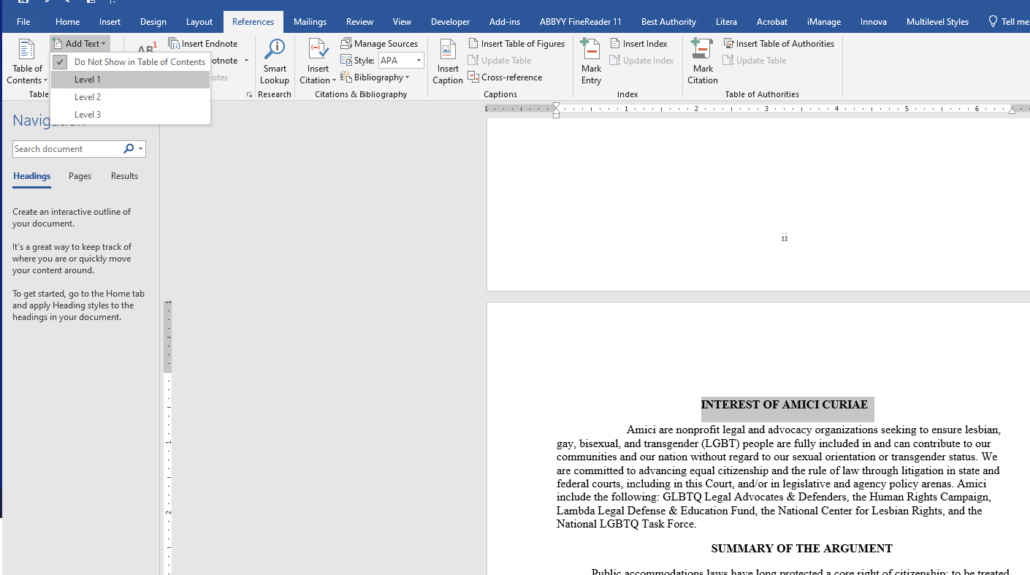
If everything is working correctly you should see the headings added on the Navigation pane at the left.
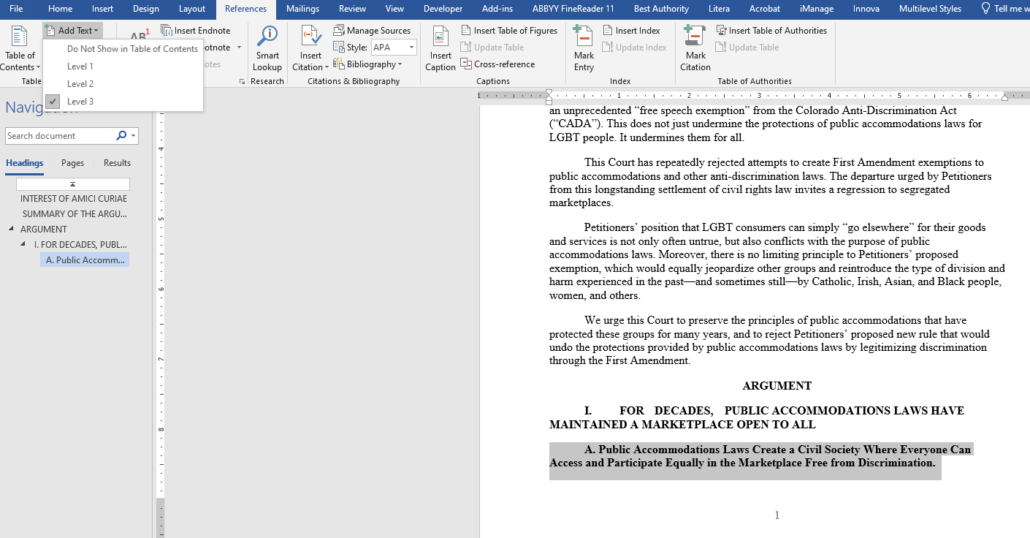
7. The heading should show up on the Navigation Pane (to display this go to View . . . Show section.) For some reason, MS Word 2019 often alters the capitalization of the headings in the Navigation pane. But this doesn’t seem to change the final result when the ToC is inserted into the document.
8. On the References tab add in the Table of Contents on the second page of the Word document, or the first page of the section section.
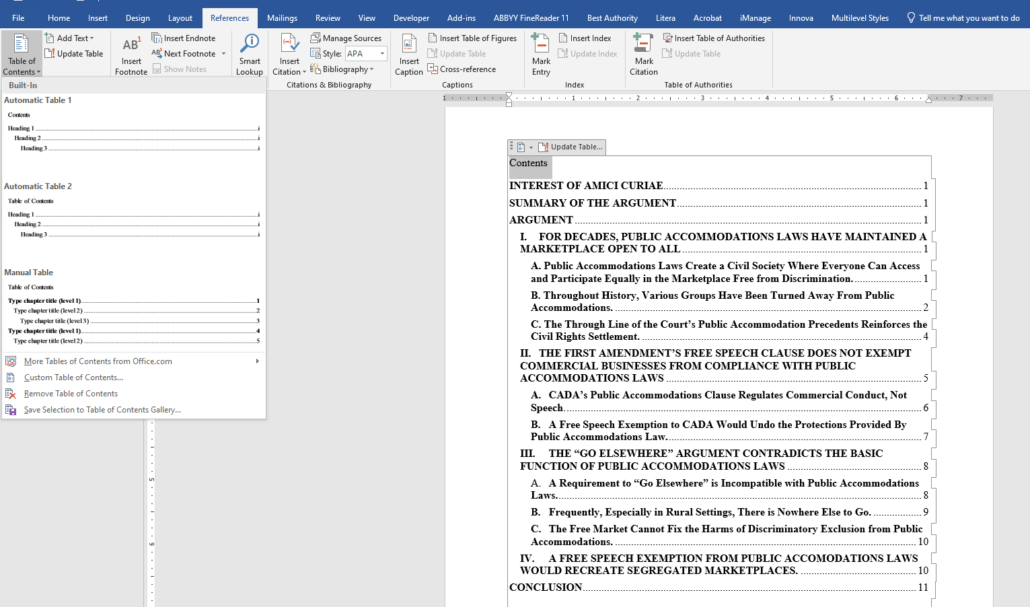
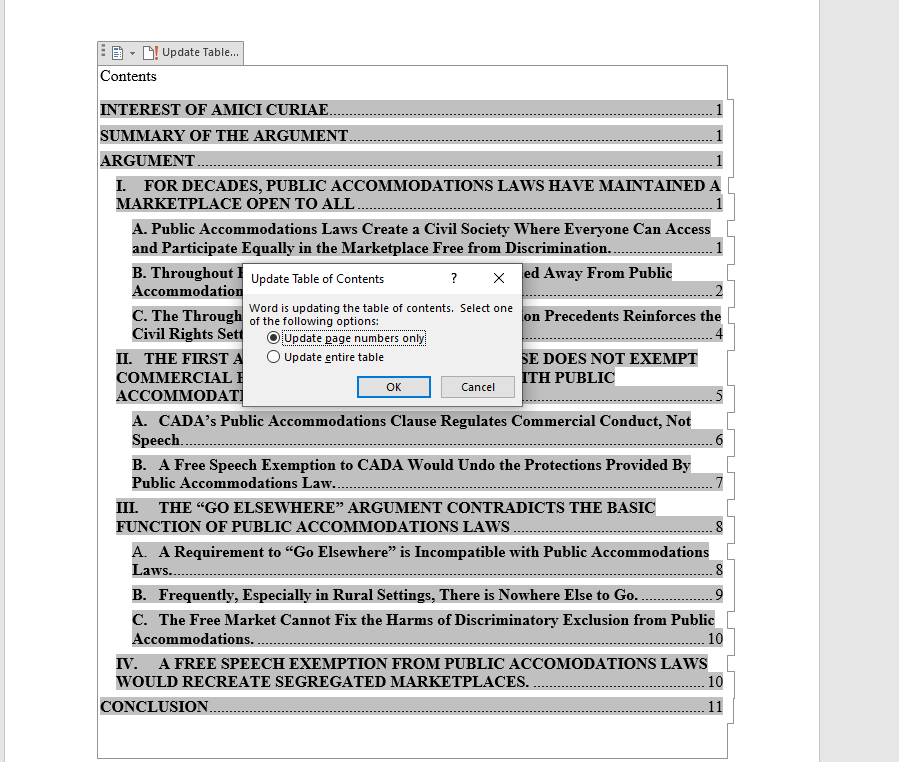
You will now have a ToC which can be automatically updated by selecting the ‘Update Table’ option which appears at the top when you click into the table.
